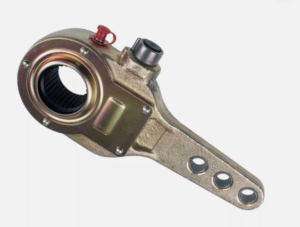
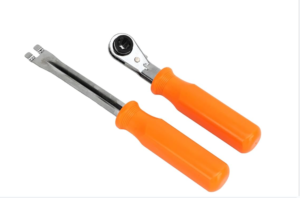
Troubleshooting common issues with automatic slack adjusters often involves checking for incorrect installation and ensuring proper lubrication. Regular maintenance checks are also essential to identify and rectify common problems.
Automatic slack adjusters are crucial for the safe and efficient operation of heavy-duty vehicles, playing a significant role in brake performance. Given their importance, understanding the common issues that may arise with these components is essential for truck operators and mechanics.
Regular inspection routines can detect early signs of wear or malfunction, such as unadjusted brakes or unusual noise, which if ignored, could escalate into serious safety concerns. Vehicle owners must be aware of the maintenance schedule and the correct procedures for inspecting slack adjusters to prevent downtime and costly repairs. Adequate training on the operation and servicing of these components ensures longevity and reliability of the braking system, leading to safer driving conditions.
Common Issues With Automatic Slack Adjusters
Automatic slack adjusters are crucial in maintaining the correct tension on a vehicle’s braking system. They adjust the brakes automatically as needed, ensuring the vehicle stops effectively. Despite their importance, they can encounter several problems. Identifying and troubleshooting these issues is key to keeping vehicles safe on the road.
Overadjustment
Overadjustment means the brakes are too tight. This leads to excessive brake wear and heat build-up. Signs include a drag when moving or hot wheel hubs.
Underadjustment
Underadjustment results in too much slack. This causes poor brake performance. It’s often indicated by a soft brake pedal or increased stopping distance.
Corrosion
Corrosion can cripple slack adjusters. It appears as rust or pitting on components. Road chemicals and salt can speed up this problem. Regular inspections can catch corrosion early.
Lack Of Lubrication
Slack adjusters need regular lubrication. Without it, parts grind together. This friction can lead to failure. Check lubrication levels often and top up as needed.
Weak Or Broken Springs
Springs give tension. Weak or broken springs can’t hold this tension. Brakes may then fail to engage properly. Replace springs as part of your maintenance routine.
Misalignment
Correct alignment ensures smooth operation. Misalignment causes uneven brake wear. It can even affect steering. Regular alignments and checks help prevent this issue.
Air Leaks
Air-powered brakes rely on a tight system. An air leak can cause brake failure. Listen for hissing sounds and check for leaks often. Fix leaks immediately.
Wear And Tear
Ordinary use causes wear and tear. Over time, parts need replacing. Watch for performance drops as a sign. Keeping up with regular maintenance extends system life.
How To Troubleshoot Overadjustment
Brakes play a crucial role in the safety and reliability of heavy-duty vehicles. Automatic slack adjusters are vital components ensuring brakes function properly. But what if they’re adjusting too much? Let’s delve into troubleshooting overadjustment issues in automatic slack adjusters.
Identify The Signs Of Overadjustment
Knowing when an automatic slack adjuster is overdoing its job is the first step. Here are the primary signs:
- Excessive brake heat: Wheels are hotter than usual after a drive.
- Unusual brake noise: Squealing or grinding sounds during braking.
- Poor brake performance: The need to apply extra force on the brake pedal.
- Inconsistent brake pressure: Difficulty maintaining steady braking.
Inspect And Measure The Slack Adjuster
After identifying overadjustment signs, conduct a thorough inspection:
- Secure the vehicle and release the brakes.
- Locate the slack adjuster attached to the push rod.
- Use a ruler or a slack adjuster tool to measure the push rod’s travel.
- Compare the measurement with the manufacturer’s specifications.
If the measurement exceeds specs, overadjustment is likely.
Adjust The Slack Adjuster As Needed
To correct overadjustment, follow these steps:
- Chock the wheels and apply the parking brake for safety.
- Locate the adjustment mechanism on the slack adjuster.
- Turn the adjusting nut or screw according to the service manual.
- Retest push rod travel to ensure it’s within safe limits.
Regular maintenance checks can prevent future overadjustment.
Troubleshooting Underadjustment
Automatic slack adjusters play a key role in the brake system of heavy vehicles. Ensuring they are properly adjusted is crucial for safety on the road. Let’s dive into methods for troubleshooting underadjustment issues.
H3 section about Recognizing the Symptoms of Underadjustment
Recognize The Symptoms Of Underadjustment
Spotting early signs of underadjustment helps prevent bigger problems. Be alert for these symptoms:
- Long brake stroke – Check stroke length during inspections.
- Uneven brake performance – Feel for any inconsistencies when braking.
- Excessive pushrod travel – Measure to ensure it is within specifications.
H3 section about Checking the Slack Adjuster’s Condition
Check The Slack Adjuster’s Condition
Inspect the adjuster’s physical condition.
- Look for wear and tear – Examine for visual signs of damage.
- Ensure correct installation – Verify that the adjuster is installed properly.
- Check for loose components – Tighten any parts that are not secure.
H3 section about Adjusting the Slack Adjuster Properly
Adjust The Slack Adjuster Properly
To adjust the slack adjuster:
- Release the brake – Ensure the brake is not applied.
- Turn the adjustment nut – Rotate until slight resistance is felt.
- Back off the nut – Usually, a quarter turn is sufficient.
Note: Always follow the manufacturer’s guidelines for precise adjustments.
Dealing With Corrosion Issues
Dealing with corrosion issues is crucial to maintaining the integrity of automatic slack adjusters on heavy-duty vehicles. Over time, these components can succumb to the harsh environment they operate in, leading to impaired function or outright failure. In this post, we’ll delve into the steps to combat corrosion and ensure your adjusters remain in top condition.
Identify Signs Of Corrosion
Recognizing early signs of corrosion is key to preventing more severe issues. Look for:
- Rust formation on the adjuster surface.
- Discoloration or changes in material texture.
- Difficulty in adjustment operations.
These indicators suggest it’s time for a closer inspection and immediate action.
Clean And Remove Rust
Once corrosion is spotted, take these steps:
- Disassemble the adjuster, if necessary.
- Use a wire brush or sandpaper to scrub off rust.
- Clean the surface with a solvent to remove residual grime.
Ensuring all rust and debris are gone prevents future corrosion.
Apply Protective Coatings
After removing rust, apply the following:
- Corrosion-inhibiting primer to prep the surface.
- A layer of anti-corrosion paint for added defense.
- Grease or lubricants on moving parts to reduce wear.
These coatings safeguard against moisture and salt, prolonging adjuster lifespan.
Lack Of Lubrication Troubleshooting
Maintaining your automatic slack adjusters is crucial for optimal brake performance. One common issue is lack of lubrication. Proper lubrication prevents premature wear and tear. Let’s walk through steps to troubleshoot this problem.
Recognize The Effects Of Insufficient Lubrication
Identifying signs of inadequate lubrication in automatic slack adjusters is step one. You may notice unusual noises or inconsistent brake performance. Over time, this can lead to increased maintenance costs and safety risks.
- Squeaking or grinding noises
- Stiffness during adjustment
- Excessive wear on brake components
Inspect And Lubricate The Slack Adjuster
Routine inspection and lubrication keep components functioning well. Spot the early signs and apply lubricant promptly. Follow these steps:
- Ensure the vehicle is secure and wheels are chocked.
- Locate the slack adjuster on the air brake system.
- Inspect for wear or damage. Look for dry or rusty areas.
- Apply lubricant to moving parts and pivot points.
Use High-quality Lubricants
When selecting a lubricant, choose a high-quality option to ensure the best protection. Cheap lubricants may not withstand the heat and pressure of the brake system. Look for these properties:
Property | Description |
Heat Resistance | Stable at high temperatures |
Pressure Tolerance | Effective under heavy loads |
Corrosion Inhibition | Protects metal surfaces |
Regularly check your automatic slack adjusters. Use approved lubricants for peak performance and longevity.

Fixing Weak Or Broken Springs
Your vehicle’s automatic slack adjusters are critical for brake performance and safety. Like any component subject to wear and tear, the springs within these adjusters can become weak or break. Let’s focus on fixing weak or broken springs.
Identify The Signs Of Weak Or Broken Springs
Recognizing faulty springs in your automatic slack adjuster is crucial for maintenance. Watch out for signs like:
- Excessive brake stroke
- Uneven brake pad wear
- Loud noises during braking
Replace The Springs
Replacing the springs in an automatic slack adjuster ensures optimal brake function. Here’s a simple guide:
- Disengage the air system and chock the wheels.
- Remove the slack adjuster cover.
- Take out the old springs carefully.
- Install the new springs.
Always use manufacturer-recommended springs for the best performance.
Verify Proper Installation
Verifying installation is essential once you replace the springs. Follow these steps:
- Review the manufacturer’s manual.
- Check all components are secure.
- Test the brakes for proper function.
Proper installation prevents future issues and maintains safety.
Addressing Misalignment Issues
Keeping trucks on the road requires attention to every component, especially automatic slack adjusters. Misalignment can lead to inefficient braking and safety hazards. Regular checks prevent these risks. This part of the blog addresses misalignment, describing symptom recognition, realignment procedures, and alignment verification steps.
Recognize Symptoms Of Misalignment
Spotting misalignment early ensures vehicle safety and optimal functionality. Look for signs such as:
- Uneven brake pad wear: One side wears faster than the other.
- Noisy brakes: Squealing or grinding sounds during braking.
- Irregular brake performance: Brakes that grab or pull to one side.
Monitor these symptoms closely. They indicate it’s time for an adjustment.
Realign The Slack Adjuster
Correcting the slack adjuster alignment is essential. The process involves:
- Parking on a level surface and using wheel chocks.
- Locating the slack adjuster and checking for looseness.
- Adjusting the slack according to the manufacturer’s specifications.
To ensure safety, always follow the specified steps.
Ensure Proper Alignment
Post-realignment, verify correct positioning with these actions:
Step | Action |
1 | Measure the distance between the adjuster arm and the S-cam. |
2 | Consult the service manual for the correct measurement. |
3 | Apply and release the brakes, observing for proper movement. |
Continuous preventative maintenance diminishes future misalignment chances.

Troubleshooting Air Leaks
Troubleshooting air leaks in automatic slack adjusters is crucial for maintaining effective braking systems in heavy-duty vehicles. Air leaks can lead to brake failure and safety hazards. Methodical troubleshooting ensures your vehicle stays safe and compliant with transportation regulations.
Identify Signs Of Air Leaks
Detecting air leaks early can prevent larger issues down the line. Listen for hissing sounds or watch for the air pressure gauge dropping more rapidly than usual. Check for visibly damaged hoses or components while the system is pressurized.
Check Air Connections And Seals
Inspect all connections including hoses, couplings, and valves. Ensure seals are intact and fittings are tight. Use soapy water to locate hard-to-find leaks; bubbles form where air escapes. Note all problematic areas for further action.
Repair Or Replace Faulty Parts
Once detected, address air leaks promptly. Tighten loose connections and replace worn seals or damaged parts. Use only high-quality replacements to avoid future issues. Regular maintenance prevents leaks and extends the life of brake components.
Preventing And Managing Wear And Tear
Keeping automatic slack adjusters in top condition is crucial for the safety and efficiency of commercial vehicles. Understanding the maintenance of these components prevents costly repairs and downtime.
Recognize Signs Of Wear And Tear
Timely identification of issues ensures the longevity of slack adjusters.
- Look for visual cues like oil leakage.
- Listen to unusual noises during brake applications.
- Feel if the brake strokes are longer than usual.
Regularly Inspect The Slack Adjuster
Regular inspections help catch problems early.
- Check the slack adjuster during routine maintenance.
- Measure the brake adjustment according to manufacturer specs.
- Observe for any physical damage or corrosion.
Replace Worn Components
Component replacement avoids future failures.
Component | Service Interval | Notes |
Brake Pads | As per usage | Wear rate varies with load and driving conditions |
Slack Adjuster | Every 1 – 2 years | May require earlier replacement if signs of wear are evident |
Conclusion
Navigating the intricacies of automatic slack adjusters need not be overwhelming. Armed with the right knowledge and tools, most common issues can be addressed efficiently. By consistently applying the troubleshooting steps outlined, operators can ensure the longevity and safety of their braking systems.
Remember, timely maintenance is key in avoiding roadside headaches. Keep those adjusters in check, and your journeys will remain smooth and secure.
Related Article
Read Now
How Much Free Play Should You Expect in a Slack Adjuster? Maximize Performance!
The ideal amount of free play in a slack adjuster...
Read MoreRevolutionary Evolution: Historical Development of the Automatic Slack Adjuster
The automatic slack adjuster (ASA) has developed over time to...
Read MoreCustom Solutions for Automatic Slack Adjuster Systems: Boost Safety & Efficiency
Custom Solutions for Automatic Slack Adjuster Systems enhance braking consistency...
Read MoreAutomatic Slack Adjuster Warranty And Repair Information: Quick Guide
Automatic Slack Adjusters come with various warranty conditions, which typically...
Read More


